To add a new route from the Route Listing page:
1)Click Add New to open the Add New Route page.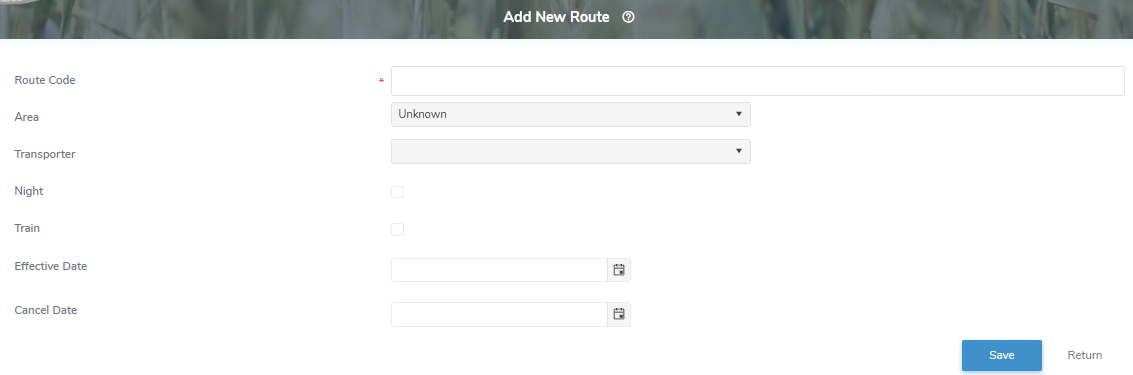
2)Complete the following mandatory details:
•Route Code*: Type assigned number of the route.
•Area: Click the arrow to find and select the desired main area that the route operates.
•Transporter: Click the arrow to find and select the transporter managing the route.
 Note: A transporter name may be left blank however the route will not display in the route listing of the handheld devices as a route to select.
•Night: Select the Night check box if route is completed at night.
•Train: Select Train check box if route uses two trailers.
•Effective Date: Type date or click Calendar icon to select date that the route became operational.
•Cancel Date: Type date or click Calendar icon to select date that the route is discontinued.
3)Click Save. A message displays you have successfully saved a new route and the route details display on the Route page.
– or –
Click Cancel to return to the Route Listing page without saving changes.
The screen proceeds to the Route page, where you can:
4)Click Edit to make changes to the route details (see Adding a new route for more information);
– or –
Click Return to return to the Route Listing page.
 Tip: After adding a new route you can continue and add route stops (see Managing route stops for more information.)