The Create Request dialog allows you to make limited updates to a credit request. From this dialog, you can edit the credit transfer amount, change the status of the request (approve or cancel), and upload supporting documents as needed.
At the bottom of the dialog, system details are displayed, including who originally created the credit request and when it was created, as well as who last updated it and the date of the most recent update.
Adding a new credit request listing
To add a new credit request listing from the Credit Request Listing screen:
1)Click Add Request to open the Credit Request dialog.
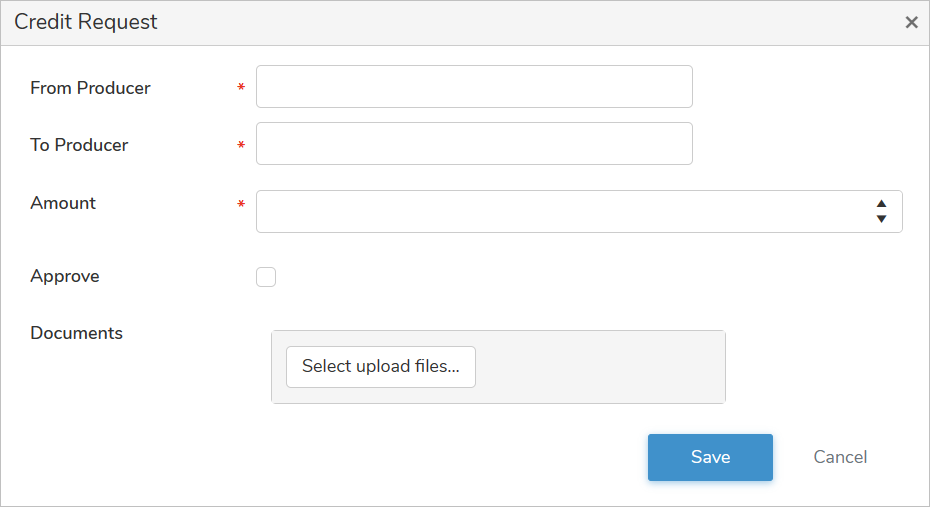
2)Complete the following details:
•From Producer*: Type partial or full number of producer, and then use the scroll bar to move up or down to find and select the desired producer you wish to transfer credits from.
•To Producer*: Type partial or full number of producer, and then use the scroll bar to move up or down to find and select the desired producer you wish to transfer credits to.
•Amount: Type or use the arrows to select the amount of BFat (kgs) credits to be transfer as part of the request.
 Note: A message will appear if the producer is unable to send or receive the credit.
•Approve: Select the check box if the request is approved.
•Documents: Select upload files to select the files you wish to add.
3)Click Save. The credit transfer details display on the Credit Request Listing screen.
– or –
Click Cancel to return to the Credit Transfer Period page without saving changes.
Updating a credit request listing
To edit or update a credit request listing from the Credit Request Listing screen: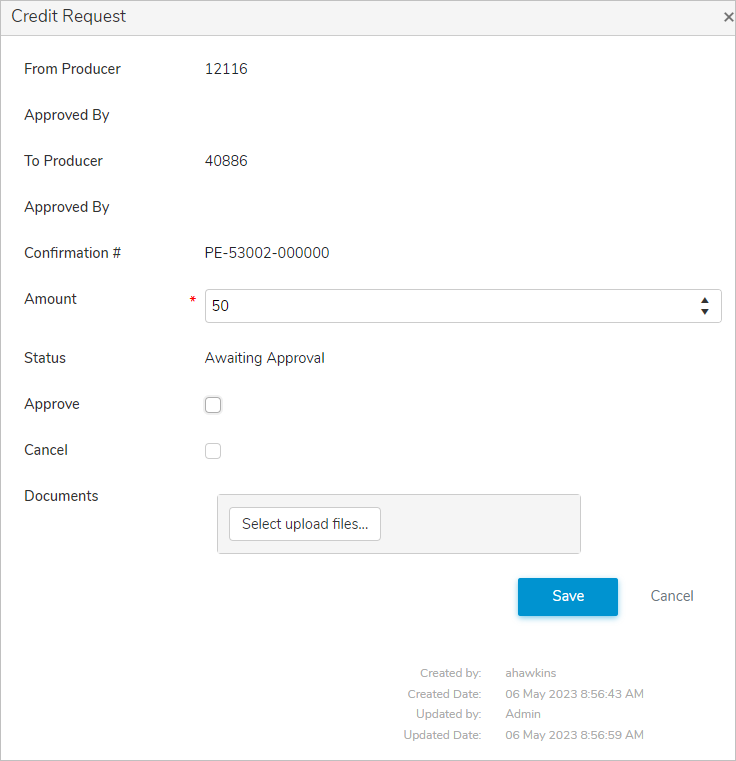
1)Click the Edit icon to open the Credit Request dialog.
2)Update the following details as needed.
•Amount*: Type or use the arrows to select the amount of credits to be transfer as part of the request.
•Approve: Select the check box if the request is approved.
•Cancel: Select the check box if the request is cancelled.
Note: You must record the reason for the cancellation if the Cancel check box is selected.
•Cancel Reason*: Type the reason for the cancellation.
•Documents: Select upload files to select the files you wish to add.
3)Click Save. The credit request listing is updated and the details display on the Credit Request Listing screen.
– or –
Click Cancel to return to the Credit Transfer Period page without saving changes.
Note: After a credit request has been approved or canceled, it becomes view-only and can no longer be updated or edited. The name of the individual who approved the credit transfer request on behalf of the producers (From and To) is displayed below the producer number.
Removing a credit request listing
To remove or delete a credit request listing from the Credit Request Listing screen:
1)Click Remove icon of the credit request listing you wish to remove.
2)Click OK to confirm you want to delete this item. The credit request listing and its detailed information are deleted from the Credit Request Listing screen.
Exporting credit request listings
The credit request listings can be export in an Excel or PDF format.
To export the results from the Credit Transfer Period page:
a)Click Export to Excel to export the details in an Excel format.
 Tip: By default, most downloaded files open in the Internet browser currently in use, usually in a new window or to your Downloads file on your computer.
– or –
b)Click Export to PDF to export the details in a pdf format.